Affiliate Disclosure: This article contains affiliate links. If you make a purchase through these links, we may earn a commission at no additional cost to you.
 Mena
MenaI got tired of managing a mountain of paper!!
It’s been about six months since I started seriously using an iPad Pro for manufacturing work. This article rounds up what I’ve learned about putting an iPad to work in a manufacturing job.
Since I started using an iPad, I’ve gone largely paperless and rarely have to carry around stacks of documents anymore.
Drawings are searchable too, so I can find the information I need dramatically faster.
Project management has also gotten much easier to keep organized per project — the iPad’s versatility is honestly good enough that it makes me a little worried about how far behind manufacturing (in Japan, at least) still is on IT adoption.
By the end of this article, that iPad gathering dust at home should be ready to become a real work tool.
Getting set up before using an iPad for work
Before you get started, there’s a minimum iPad spec, some prep work, and a couple of optional accessories worth having.
Let’s go through them one at a time.
iPad specs to look for
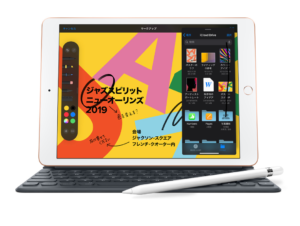
The one hard requirement for the iPad you use for this workflow is a USB-C port.
You’ll be moving data around with USB drives fairly often, so if you’re shopping for an iPad with this in mind, make sure to get a USB-C model.
iPads with a USB-C port include:
- iPad Pro 11-inch (1st generation or later)
- iPad Pro 12.9-inch (3rd generation or later)
- iPad Air (4th generation or later)
- iPad mini (6th generation)
I personally use a notebook-sized iPad Pro 11-inch (3rd generation).
If cost is a concern, an iPad Air works just fine too.
I wouldn’t recommend an iPad mini for this kind of heavy use — the screen is too small for it.
Clearing compliance concerns
One thing that comes up right away when you want to use an iPad for work is compliance.
Sorry to jump straight into a compliance discussion, but it matters. Unless you work at a very small company, freely downloading company data onto a personal device is off-limits at most workplaces.
My own company is no exception — there’s a rule that drawing data and confidential documents have to be handled through a company-issued USB drive.
Modern iPads can now do quite a lot of what a PC can, and editing with the Apple Pencil is convenient too.
It’s even become possible to handwrite directly onto data stored on a USB drive.
What I did was buy a USB drive well-suited to the iPad and negotiate with my manager to get permission to use my own iPad at work (laughs).
Follow your own company’s rules and adapt this setup to fit your workplace’s policies.
Optional accessories you’ll want for the iPad
This particular workflow needs two optional accessories.
- Apple Pencil
- A USB drive
That’s it — just those two.
The Apple Pencil is what gives the iPad that paper-like feel.
Apple Pencil (2nd generation) — View on Amazon
There are also some solid, cheaper third-party options these days.
Reviews are good, and functionally they’re nearly identical to the real thing (aside from lacking touch-control gestures), so I’d recommend them.
If I ever lose the one I’m using now, this is probably what I’d replace it with.
GOOJODOQ GD13 stylus (magnetic wireless charging, tilt & palm rejection) — View on Amazon
For the USB drive, I use a Transcend JetFlash.
It has both a Type-A and a Type-C connector and reads/writes fast enough that it’s completely stress-free.
I use it a lot to move data between computers, so it’s worth not skimping and buying something too cheap.
Transcend JetFlash 930C 256GB (USB 3.2 Gen 1, Type-A / Type-C dual connector) — View on Amazon
7 ways to put an iPad to work in manufacturing
1. As a PDF viewer
For a PDF viewer, I use a file-management app called Documents.
The iPad has a built-in app called Files with similar functionality, but in day-to-day use I ran into PDF files crashing and annotation editing being clunky, so I stopped using it.
You can download Documents from the link below.

Here’s what it looks like once you download and open it. You’ll generally want to keep the USB drive plugged in while you work. As you’d expect, if you unplug the USB drive mid-edit, the edit gets interrupted — keep that in mind.
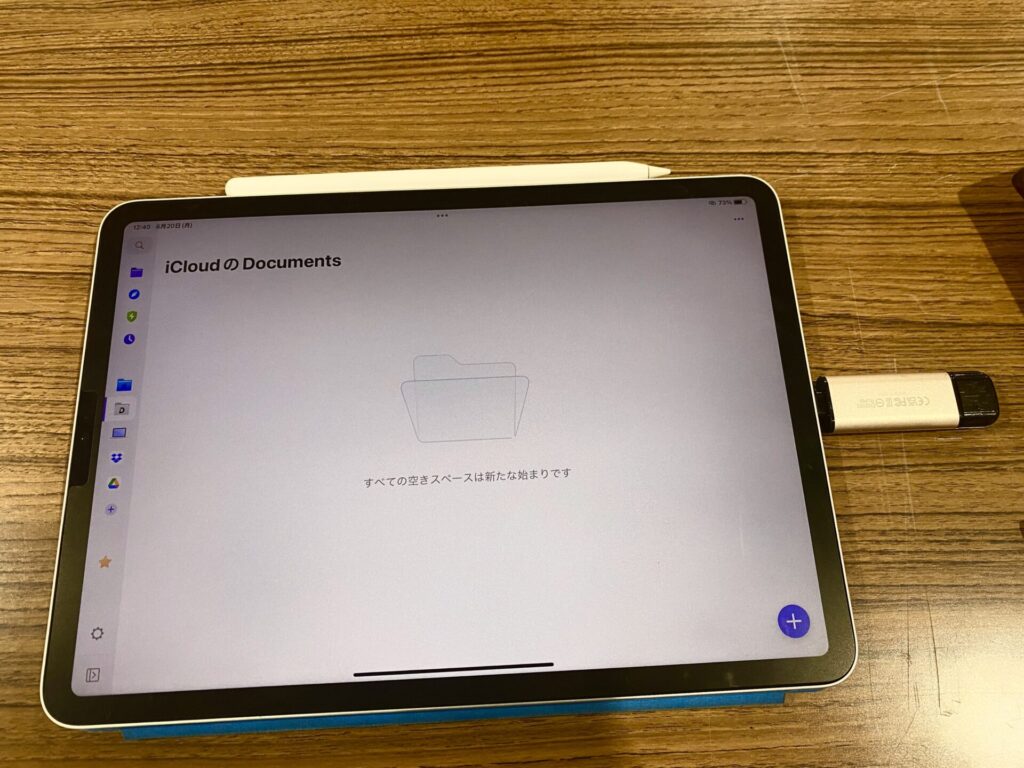
From the screen below, select the Apple folder.
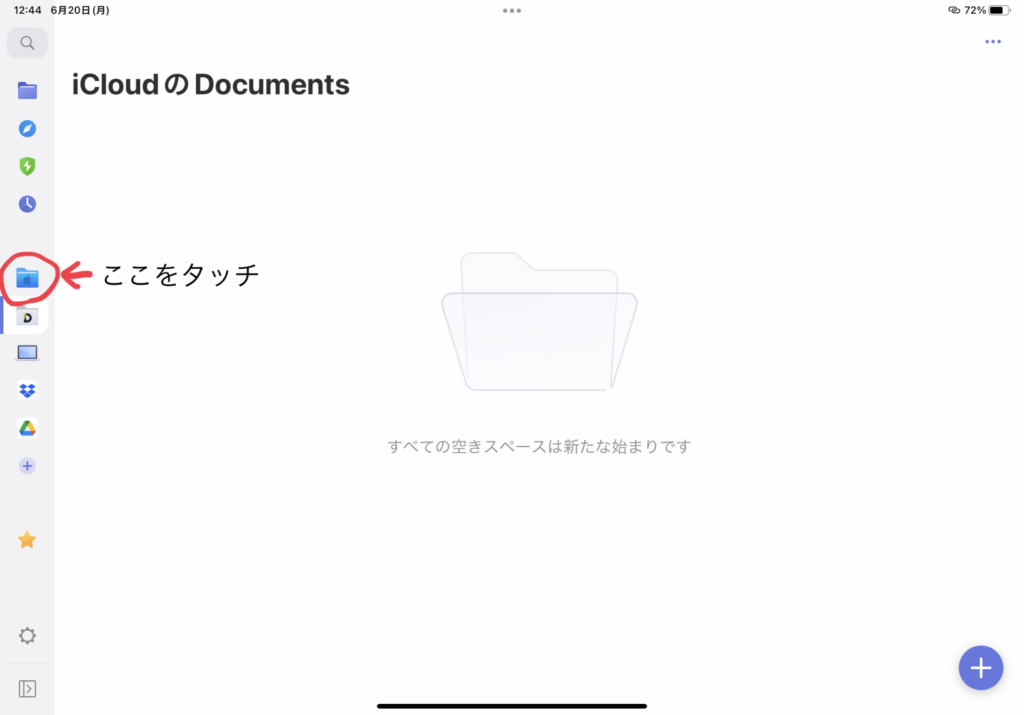
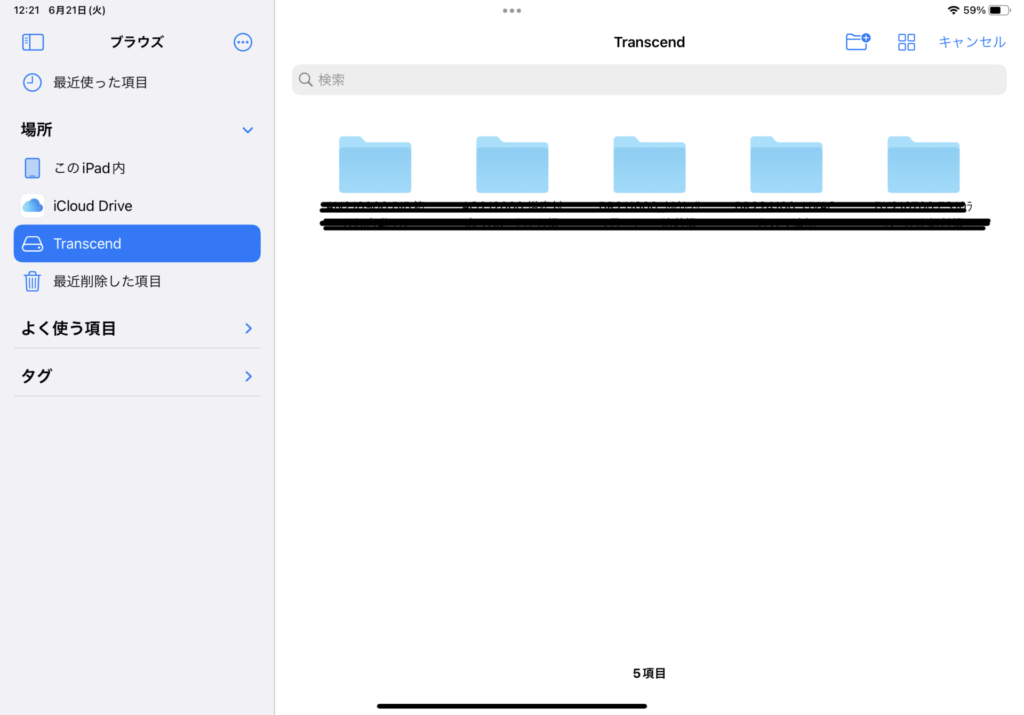
You’ll get a screen for choosing which folder on the iPad to open — tap the icon in the top left and your connected USB drive will show up, so select it.
From there, a familiar PC-style folder view appears, and you can select a PDF from a folder to load it.
Here’s the viewing screen once a PDF is loaded.
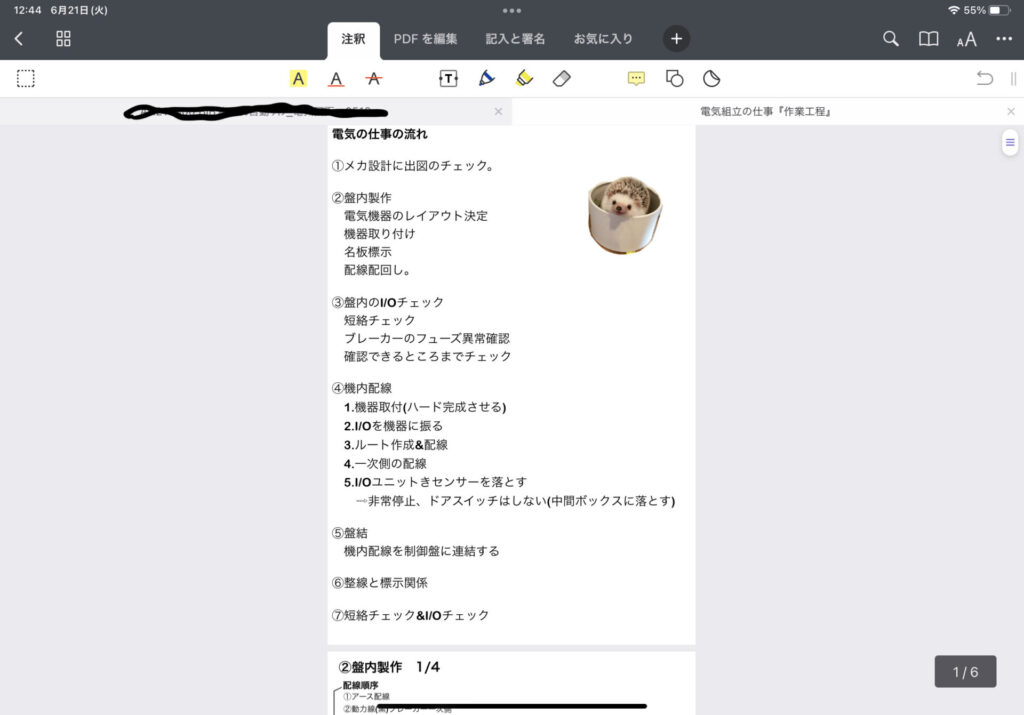
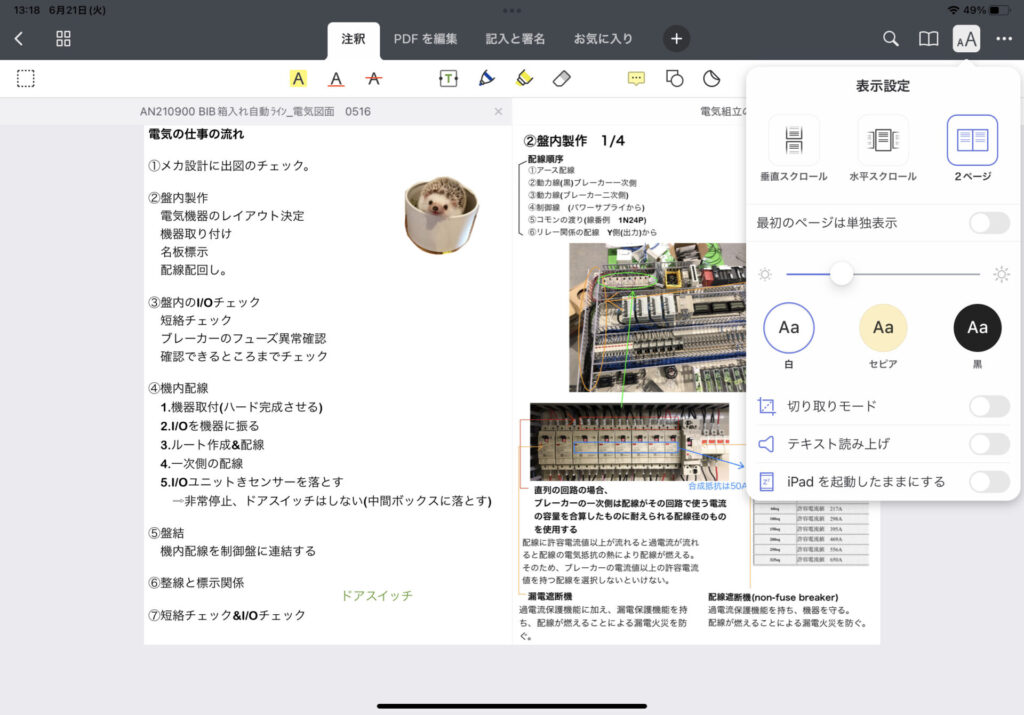
There are tabs at the top, so you can open several PDFs at once and switch between them. A nice touch is a 2-page spread view that reproduces the feel of reading a physical book, letting you view facing pages — it’s a small thing, but it’s genuinely great.
2. Marking up and editing PDFs
Documents has a feature for directly editing PDFs, but it’s a paid monthly subscription. Adding annotations is free, so I stick to annotation-only editing.
Annotation editing supports handwriting directly with the Apple Pencil, as well as typing with the on-screen keyboard. Here’s roughly what it looks like when you actually add and edit annotations.
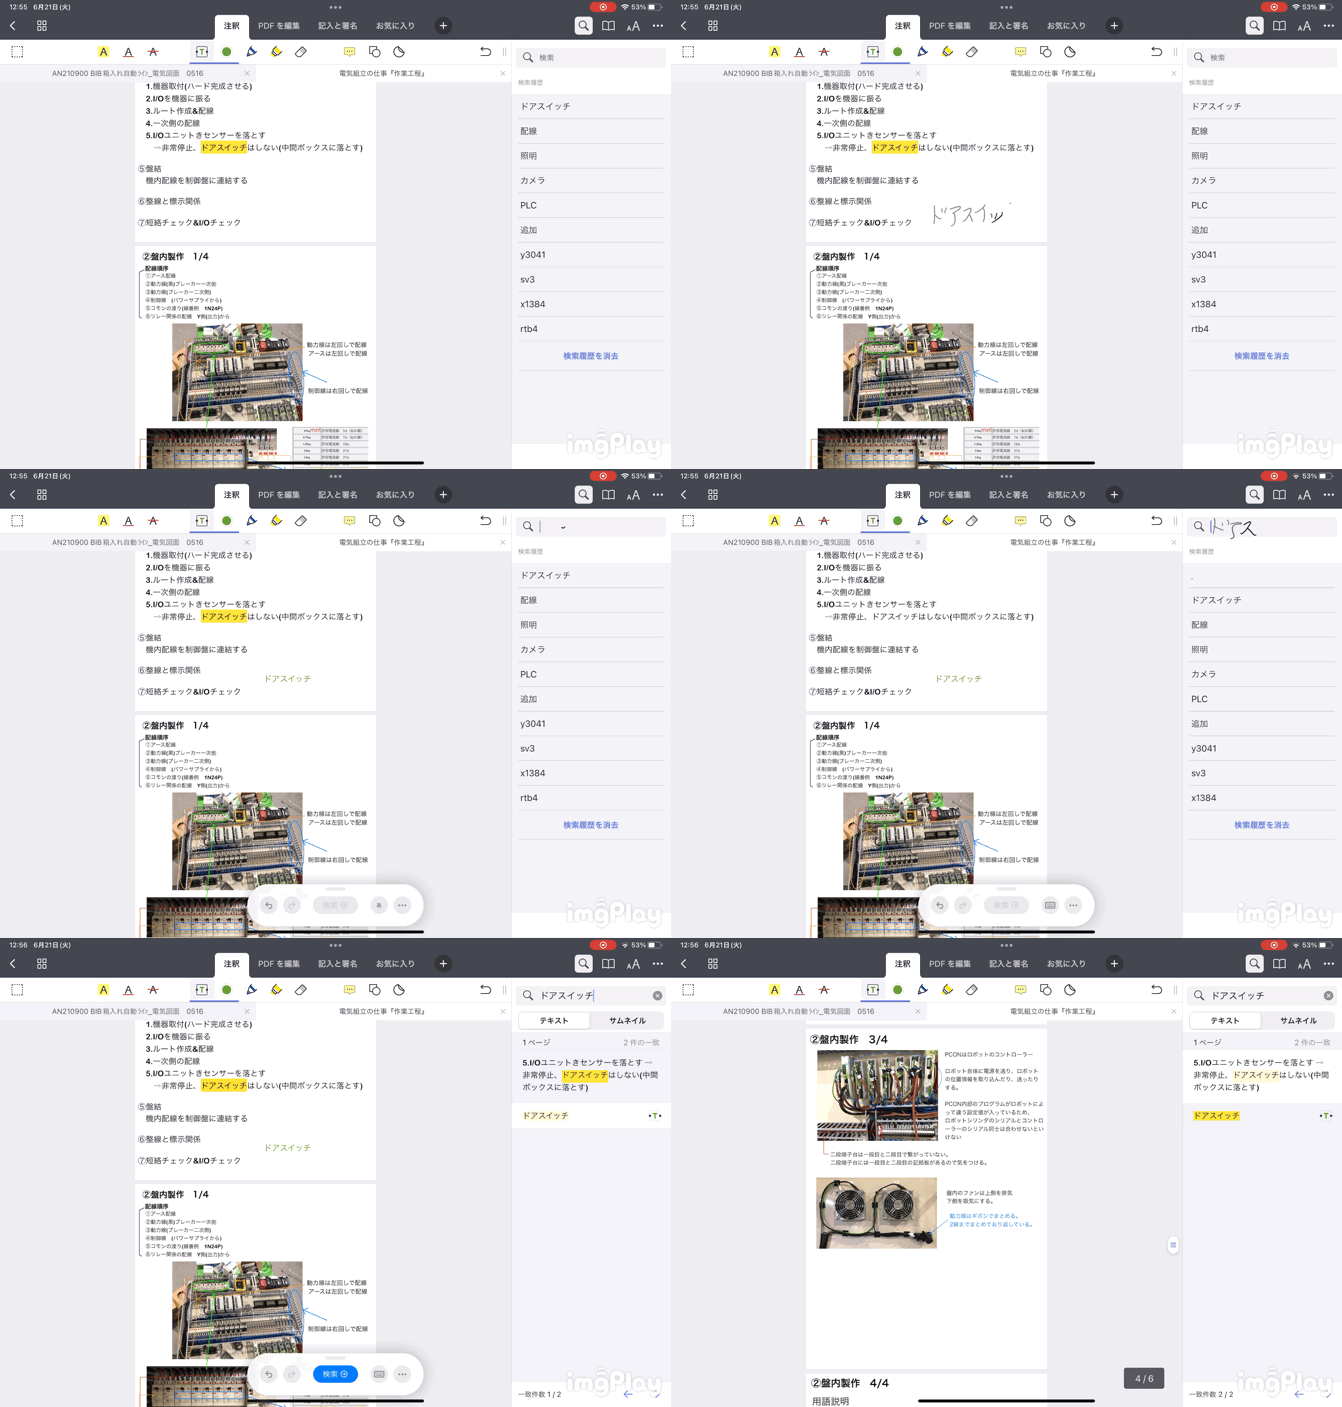
In my case, I select text input → handwrite → convert via handwriting recognition.
This app doesn’t have handwriting recognition built in, but since being searchable is all I really need, it’s not a problem for how I use it.
Search reliably picks these up, so you can add annotations to anything you want to flag and then review them all together later.
It also keeps a search history, so seeing the words you search often show up is a nice bonus.
3. As a drawing viewer
A CAD viewer is something you can’t really do without in manufacturing.
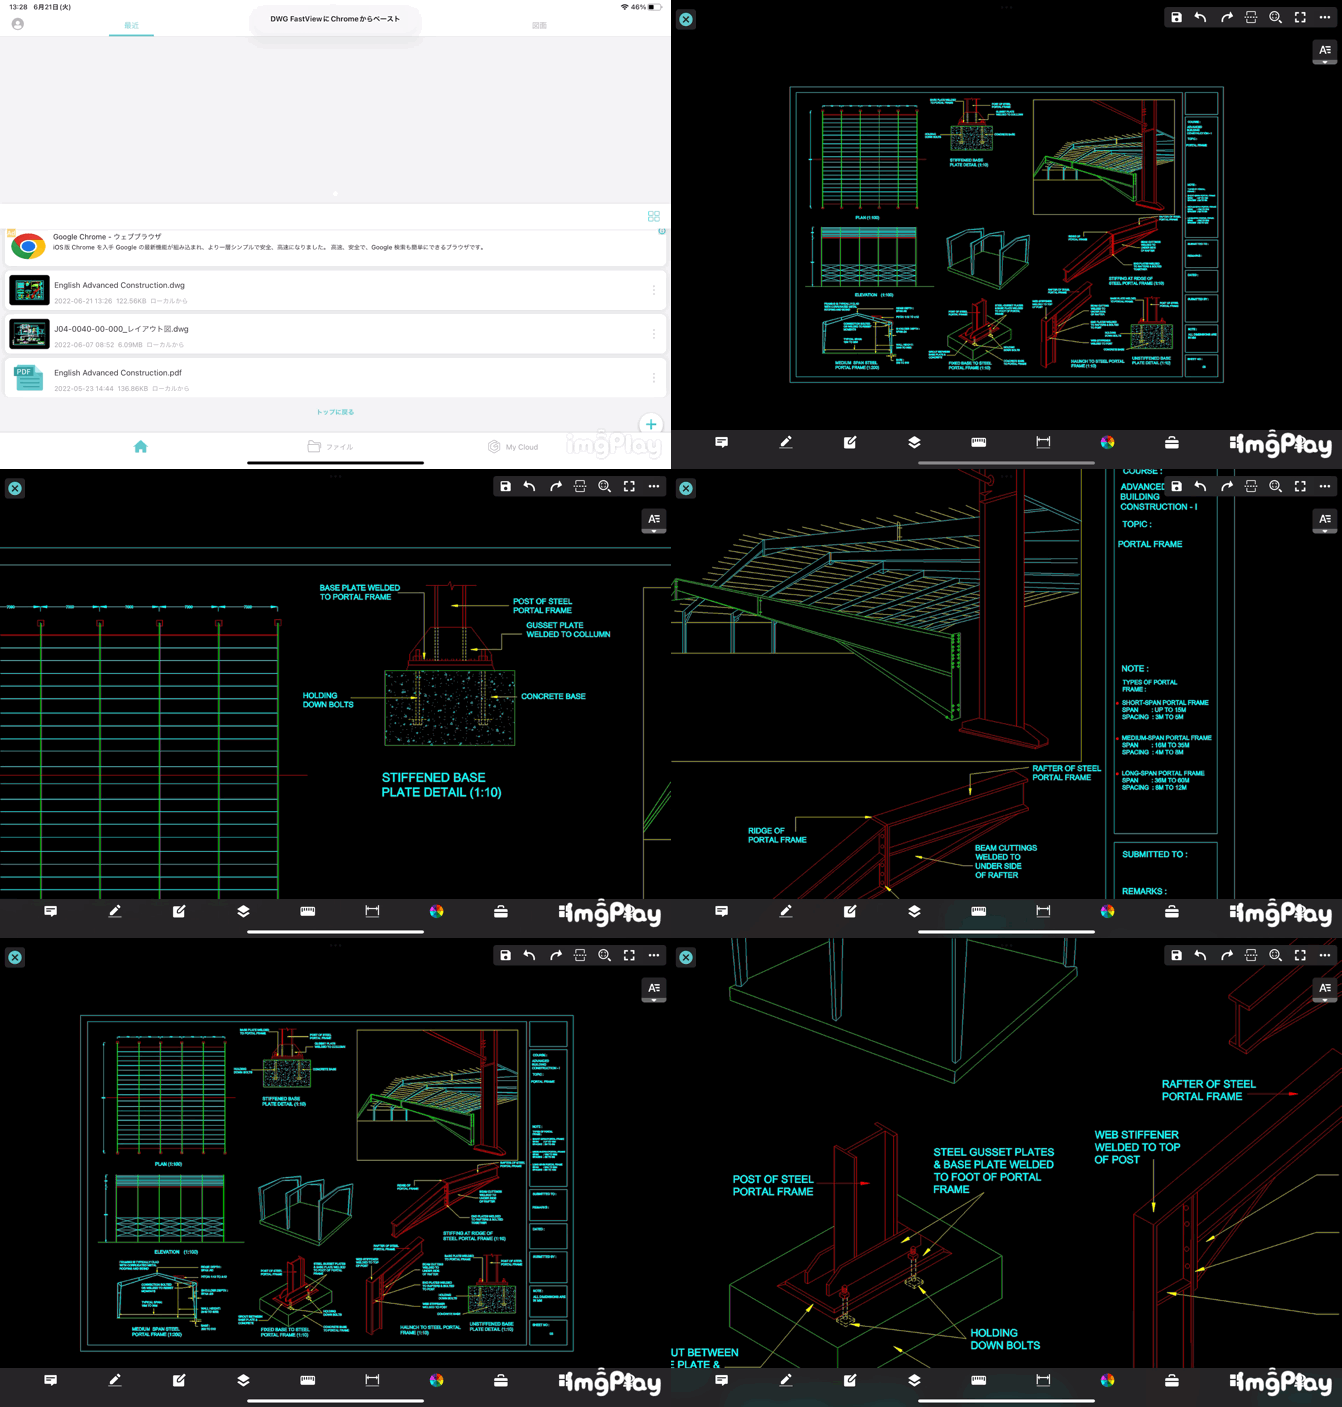
As of now, Japan’s 3D CAD software vendors haven’t released apps for Apple devices, but there are a decent number of 2D CAD viewer apps that handle the DWG file format.
Plenty of manufacturers still rely heavily on 2D CAD, so it’s worth introducing.
DWG FastView
A viewer app specialized for DWG files. Download it from the link below.
From the launch screen you can select a DWG file to view. It’s genuinely just a viewer, nothing more.
4. Project management (endlessly expandable notes)
For project management, I use the well-known app GoodNotes 5.
Download it from the link below.
My project management method is based on the McKinsey-style note-taking technique.
If you haven’t heard of it, the idea is that you scribble down whatever’s on your mind about work on an A4 sheet every day, and use it to observe where you tend to get stuck and what the traits of each project are.
The biggest benefit of this note-taking method is that the more notes pile up, the clearer your own weaknesses and tendencies become.
I personally organize my GoodNotes notebooks by folder. There’s a large selection of page templates, so I can pick whatever fits the moment and add a new note.
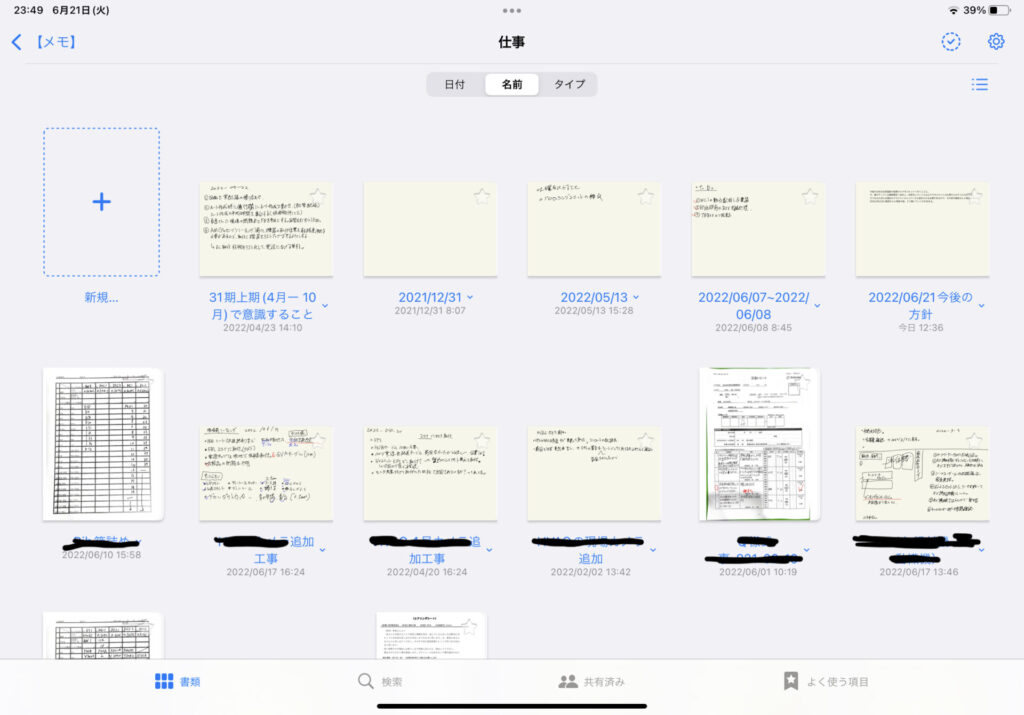
A few of the file names are blurred out here — those are the names of the projects I’m managing.
Here’s roughly what the contents of a project’s notes look like.
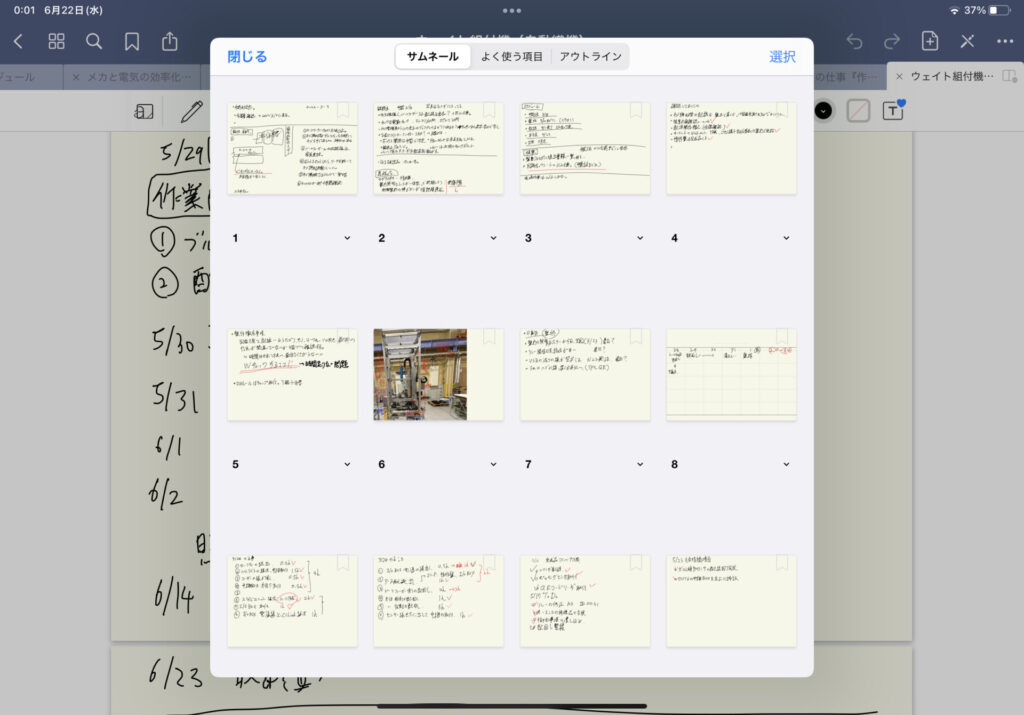
I can’t show the details, but it’s a mix of whatever data, schedules, task notes, and meeting minutes are relevant at the time.
Page 8 has a monthly schedule template pasted in, which I use to untangle a schedule that’s gotten complicated. This isn’t my own monthly schedule — I use it specifically for coordinating schedules across departments.
Here’s what it actually looks like when I’m managing it.
The right-hand icon lets you add whatever template you need. What’s written here is mostly my own handwritten notes, but this app supports searching handwritten text.
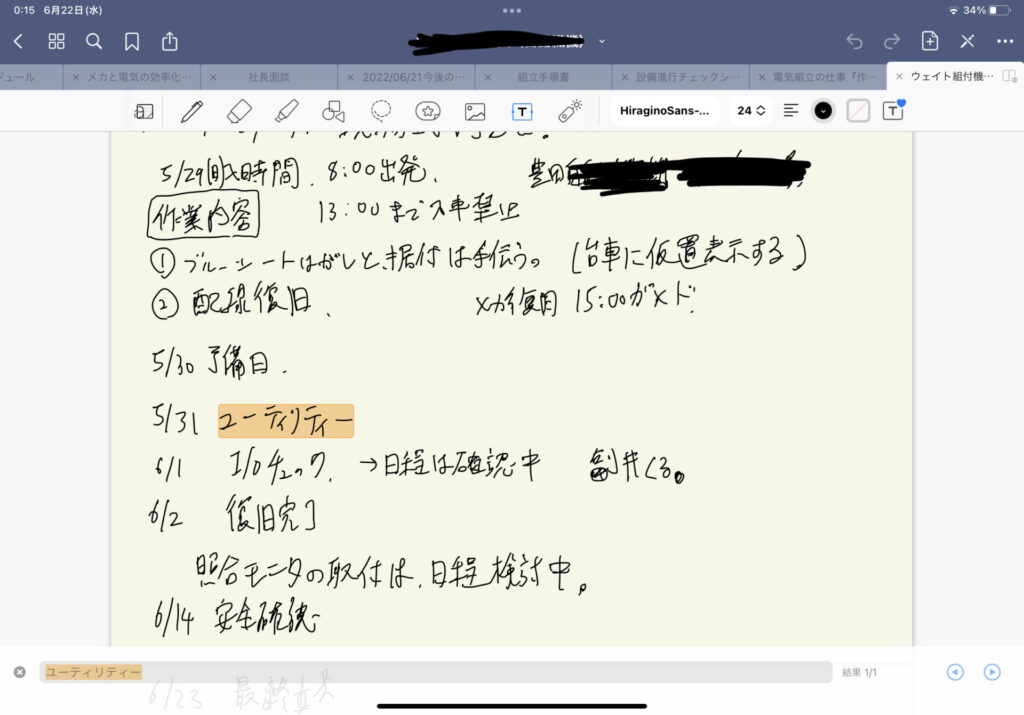
The search accuracy here is honestly ridiculous (laughs).
5. Creating documents
You can also create documents in the same app, GoodNotes 5.
Photos, text, and annotations can all be brought together in this one app, which is enough to put together simple explainer documents.
6. Scanning paper documents (with OCR text data)
This is also possible with GoodNotes 5 (yes, I really do rely on GoodNotes 5 for everything…).
GoodNotes 5 has an image-scanner feature that lets you capture documents with the camera.
This comes in handy when you want to turn paper meeting minutes or notes into a PDF.
But what’s even more useful is that the OCR feature also captures the text content of a scanned page as searchable data baked right into the PDF, so you can search by a text string and jump straight to the matching spot.
What’s even more impressive is that it can pull text data out of text that looks like it would trip up recognition, like handwriting.
7. Schedule management
For schedule management, I use Planner for iPad.
Download it from the link below.
The feature set is relatively simple — it syncs with the built-in Calendar app and reflects your schedule there.
The biggest reason I picked it as my scheduling app is that it lets you enter your schedule by hand.
Here’s roughly what the actual schedule-management screen looks like.
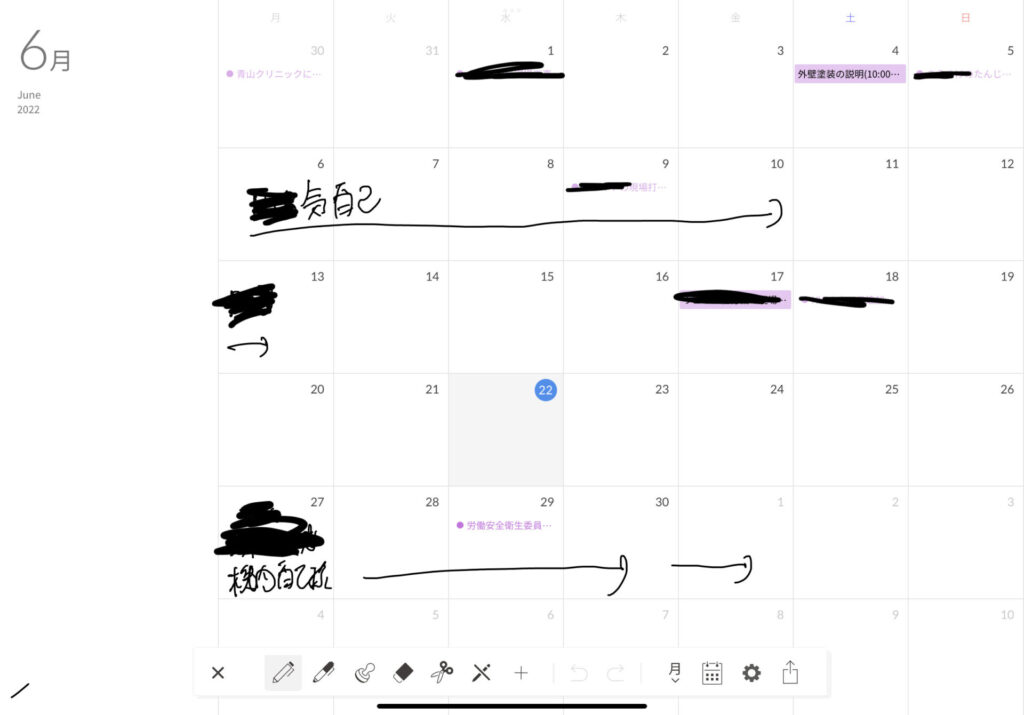
Most of it is blacked out for confidentiality, so it’s a bit hard to make out. Sorry about that.
Being able to quickly sketch something like an arrow by hand makes it feel like a familiar paper planner, which is a nice change from the usual digital hassle.
Wrap-up
So, what did you think?
Hopefully you can see just how much potential the iPad really has. It’s a gadget that can adapt its role to whatever industry or personal style you bring to it.
I hope this article helps make your work a little easier.
Thanks for reading all the way to the end.